The RV faucet in our 2003 fifth wheel stopped moving from side to side, and the nozzle didn’t automatically retract any more. A replacement was long overdue. Fortunately, installing a new RV faucet was fairly straight forward once we figured out the secret.

How to Install A RV Faucet
Begin by gathering your supplies. Lighting is important to see all the connections beneath the sink. We used a LED lantern, as well as a head lamp for direct task lighting. The parts pictured below were included in the box with the new faucet. In addition, we needed two adjustable wrenches, a pipe wrench, a small allen wrench, teflon thread tape, a screwdriver, rags, and a pan or bucket to catch water. This process is MUCH easier to do with two people, so grab a helper too.

Turn the water supply off at the source if you are hooked up, and make sure your fresh water pump is off. Place a pan or bucket in the cabinet beneath the sink to catch any water that comes out as you work. Have one person stationed above the sink and one below.
The old RV faucet had a retractable sprayer, so we removed the weight underneath the sink to pull the sprayer out. Use a screwdriver to unscrew the weight. It will come off in two pieces. Then disconnect the hose. Most likely you will be able to detach the quick connect fitting with your hands.

The person above the sink can now pull the sprayer out from the faucet.

Then detach the remaining fittings by pulling the pin out and unscrewing them. There should be two – red for hot water and blue for cold water.

Use a pipe wrench to unscrew the nut holding the base of the faucet against the sink basin. At this point the entire faucet can be lifted out from above.

Now it’s time to install the new RV faucet. The exact model we chose is no longer available, but this faucet is similar. Feed the hose of the sprayer through the faucet. Then insert all three hoses into the existing hole in the counter top.

Slip the nut over all the hoses and gently screw it into place. We’ll come back to adjust it later. In our case, the nut had a brass interior and plastic exterior as shown below.

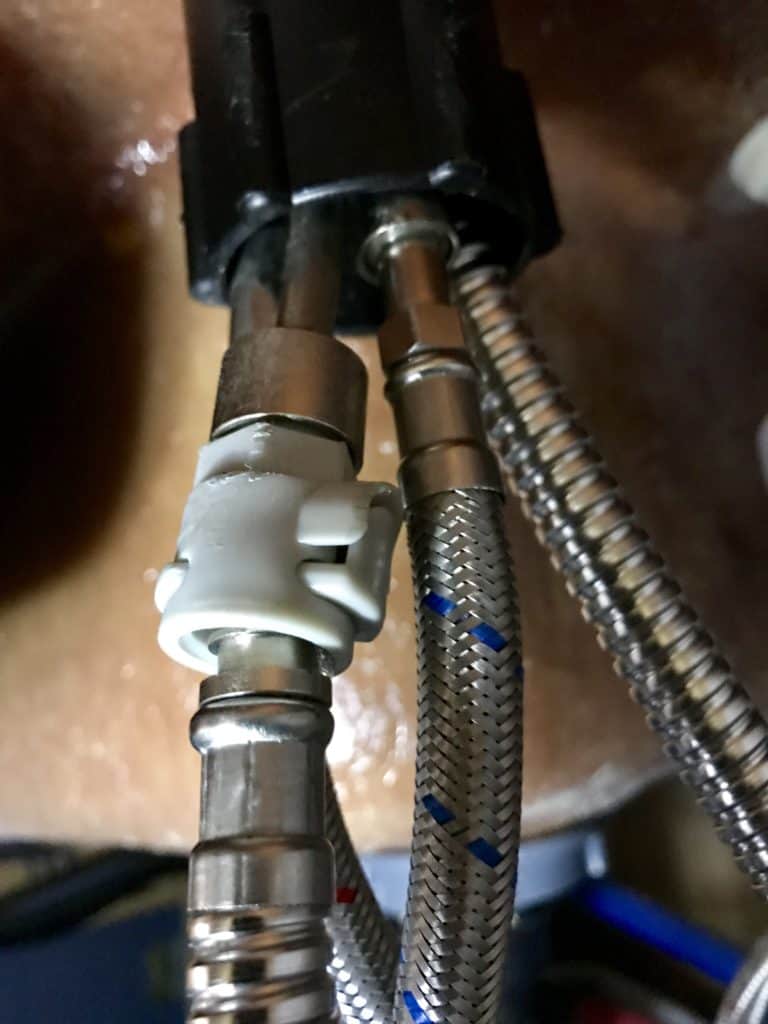
Now here’s the secret! You can install any faucet in a RV as long as you have adapters. The pipes in a sticks and bricks house are not the same size as the pipes in a RV. These adapters are key to installing a RV faucet. You’ll need two, so buy the pack.
Apply a generous portion of teflon thread tape to each adapter. Then connect the hot water line to the red pipe and the cold water line to the blue pipe. Use two adjustable wrenches to make the adapters fit as tight as possible.

Keep your pan or bucket in place while you turn the water on to test the connections. As you can see below, ours leaked a great deal. Tighten all the fittings. Then tighten them again until the leaking stops.

Now that you have the plumbing part figured out, let’s revisit the nut and faucet placement. Have the person above the sink hold the faucet in the desired position while the person below tightens the nut underneath to screw it into place.

A weight should be included in the faucet kit if your faucet has a removable sprayer. It needs to be installed on the sprayer hose below the sink. Hold the two halves around the sprayer hose and screw it back together with a screw driver. The person above the sink can test the sprayer’s retraction and convey any needed adjustments. It took us several attempts to get the weight in a position where we liked the functionality of the sprayer. Move the weight up and down the hose until the sprayer can reach all corners of the sink and then easily retracts.

Work below the sink is complete! There is just one more adjustment to make. The arm holding the sprayer can be moved up or down depending on how high or low you would like the faucet to spray hands-free. Use a teeny tiny allen wrench to loosen the arm, move it to the desired height, then tighten it back up.

And now you have installed a new faucet in your RV! It adds a great deal of functionality and style to our kitchen.

Did you notice that the water filter to the left of the faucet is now a soap dispenser? How about that back splash? Our projects keep trucking along. We are also changing out the curtains and reorganizing everything in the kitchen cabinets. Come back for more RV updates and tutorials.
If you like this post, you might also like: How to Replace LED Lights in a RV and RV Window Coverings


