I wanted to start a new tradition with the kids for Easter–making our own DIY Easter Baskets. This year’s baskets are so simple but turned out to be so fun, I will always love these little ombre DIY easter baskets. They were simple to make and they came out looking amazing.

The best part is the kids can help make the handles, dye the baskets and even guide you on what shape they want their baskets to be. This way not only will you cherish their East basket, but they will as well. Let’s get started making these easy ombre DIY Easter baskets!
Supplies for Ombre DIY Easter Baskets

- Cotton Cord
- Cold Water Dye
- ½ cup Baking Soda
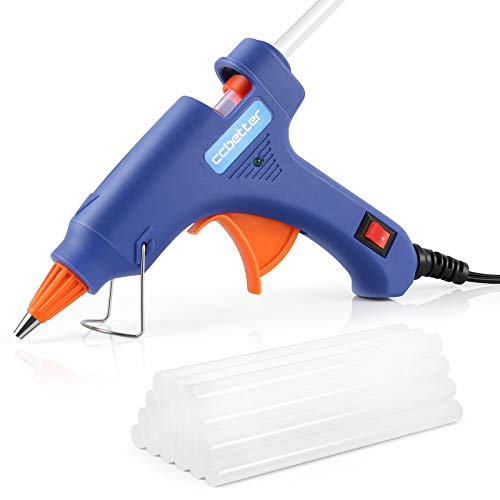
- Hot Glue Gun and Glue Sticks
- Scissors
- Large Buckets
- Gloves
- Rubber Bands
You’re going to want: a baking dish, oven, a little bit of tape, a sharp pair of scissors and a hot glue gun to make the baskets. Then, to dye the little easter baskets, you’ll want 4 large buckets, a couple of sticks that are wider than the buckets, a couple of spoons or sticks to stir the dye mixture, some gloves, and two rubber bands to make your ombre DIY easter baskets.
How to Make Ombre DIY Easter Baskets

The ombre DIY easter baskets are a lot easier to make than all those supplies would make you think. First, you want to start by deciding which of the two style baskets you want. I wanted to show how to make these two ways, one shorter and round while the other one is more egg-like in shape.

I started with the shorter, rounder one (blue after it was dyed) by making a small flat circle with the end of the rope and hot gluing the end in place. Working outward from that, making a spiral, I just hot glued every little bit of the way, trying to keep as much of the glue inside the joint as possible.

I kept the spiral as flat as possible, measuring it occasionally by placing my hand over the top of it, just to see how big it was. My goal was to make the base of the basket as large as my hand.

When the spiral reached about the width of my hand, I started building up the spiral, setting the new layer of cord on the side, then on the top of the last cord. From there, I just worked upward.

I wanted the side of the basket to be about the height of my hand, so I just used that as my “measuring stick”.

Once the sides of the basket had reached about the height of my hand, I cut the cord from the roll with about 12-inches of extra length and set that basket aside.

To make the second basket, the egg-shaped one (pink once it was dyed), I started a little differently. Instead of making a tight spiral with the end of the cord, I flattened it and made it long and skinny, hot gluing it in place.

With the basic longer length of my spiral started, like with the other basket, I just started gluing and working outward from the center. Unlike the first basket, though, I did not make the base as wide as my hand. I only worked to make the base wide enough to have a flat spot to hold the basket steady, then I started working upward. This made the width of the basket smaller, but I really liked this egg-shaped basket. Plus, I made it a lot taller, so in the end, they both hold about as many eggs which is what the kids care about!

Up and up, I wrapped the cord, hot gluing as I went, this time attempting to make the basket twice as tall as my hand. Just like with the first basket, when the basket had reached my desired height, I cut the cord from the roll with about 12-inches of extra length and set the basket aside.

Now that the two baskets were made, it was time to give them little handles, because baskets are useless without handles.

So, to make the handles, I cut 6 strips of cord about 18-inches long. Laying them flat on my table, packed tightly side-by-side, I taped one end down.

From there, I separated them into groups of two strips and braided them, keeping the sets of cord flat and not twisting them at all.

When I reached the end of the cords, I hot glued the braids together and trimmed them evenly. Then I removed the tape and did the same with the other end, carefully keeping the cords braided while I let the hot glue dry.

Once the handles were ready, I simply hot glued them to the inside of the basket, equally spaced on either side of the extra cord length.
Now comes the fun part in making ombre DIY easter baskets, time to dye the baskets. Make sure to put on the gloves as you don’t want your hands dyed as it takes a while to wear off. Don’t ask me how but I know.

I read the instructions on my cold water dyes and followed them exactly. I did not have any soda ash, so I made some by placing my baking soda into a baking pan in a thin sheet and baking it for an hour at 300 degrees. If you have soda ash, you can skip this step, but baking the baking soda turns it into soda ash. We all can learn something new like I did.

I mixed 1 portion of turquoise dye with ¼ portion of blue dye; and 1 portion of fire engine red dye with ¼ portion of fuchsia dye to make my unique color blends.

To make the ombre color pattern, I dipped my baskets in one of the buckets of dye, then immediately removed them and rinsed them.

Then I returned to the buckets and hung the baskets over the bucket, with just the bottom of the basket sitting in the dye, using the handle with a rubber band wrapped tightly around it, hanging from a stick.

I let the baskets’ trailing end of cord dangle into the dye, as well, so that it would be a little darker than the top of the basket.

My instructions on the cold water dye said to add some salt and soda ash to increase the intensity of the color, so I did that, over a 45 minute period.

Then I poured out the dyes and placed the baskets into the other two buckets, hanging them from the sticks to allow air to circulate around them evenly. I allowed the baskets to dry overnight.

Once the baskets were dry, I just made a little swirly-egg with the trailing end of the cord on each basket. Make sure to glue it in place. Now we were ready to go egg-hunting!

I love the way these Easter baskets came out. The kids were so excited to have new ombre easter baskets and I was excited to be creating a new tradition together to celebrate this fun holiday. Now you know how to create ombre DIY easter baskets with just a few supplies and a little bit of time. This is a great kid-parent project that they will definitely be proud to have helped make!

If you liked the ombre DIY Easter baskets tutorial make sure to pin it to your favorite Pinterest board or share it with friends on social media. If you decide to make the ombre Easter baskets take a picture afterward and tag us on social media as we love seeing the fabrics and color choices others make.
Ombre Easter Basket

Make your own Ombre Easter basket for this coming Easter. I love how mine came out and how it didn't take to long to create (besides the drying time). I show you how to make this Ombre Easter basket step by step.
Materials
- Cotton Cord
- Cold Water Dye
- ½ cup Baking Soda
Tools
- Hot Glue Gun and Glue Sticks
- Scissors
- Large Buckets
- Gloves
- Rubber Bands
Instructions
- Start by making a small flat circle with the end of the rope and hot gluing the end in place.
- Working outward from the start, making a spiral.
- Hot Glue about every inch.
- Keep the spiral as flat as possible working your way out to your desired size.
- Then Start building up the spiral, setting the new layer of cord on the top of the last cord. From there, I just worked upward.
- Hot Glue about every inch. Until you reach your desired height
- Then cut the cord from the roll with about 12-inches of extra length and set that basket aside.
- For Handle, I cut 6 strips of cord about 18-inches long. Laying them flat on my table, packed tightly side-by-side, I taped one end down.
- I separated them into groups of two strips and braided them.
- When I reached the end of the cords, I hot glued the braids together and trimmed them evenly
- I took the handles and hot glued them to the inside of the basket.
- For Dying follow instructions on the cold water dyes
- I mixed 1 portion of turquoise dye with ¼ portion of blue dye in your large bucket.
- Ombre dying - I dipped my baskets in one of the buckets of dye, then immediately removed them and rinsed them.
- Then using the handle with a rubber band wrapped tightly around it, the basket is hanging from a stick so just the bottom of the basket sitting in the dye.
- I let the trailing end cord to dangle in the dye as well so it would be darker.
- I wanted intense color so I add some salt and soda ash to increase the intensity of the color, so I did that, over a 45 minute period
- Then pour out the dyes and let the Easter basket hang and dry over night.
- I just made a little swirly-egg with the trailing end of the cord on each basket. Glue in place
- Enjoy your Ombre Easter Basket!
Notes
I did not have any soda ash, so I made some by placing my baking soda into a baking pan in a thin sheet and baking it for an hour at 300 degrees.
Recommended Products
As an Amazon Associate and member of other affiliate programs, I earn from qualifying purchases.


Other DIY Crafts: